| My Cart | My Acc. | Dealers | Index | ||||||
| Manuals | Affiliate |  |
Help |
|
|
|||||||||||||||||||||||||||||||||||
| Browse By Brands: | ||||||||||||||||||||||||||||||||||||
|
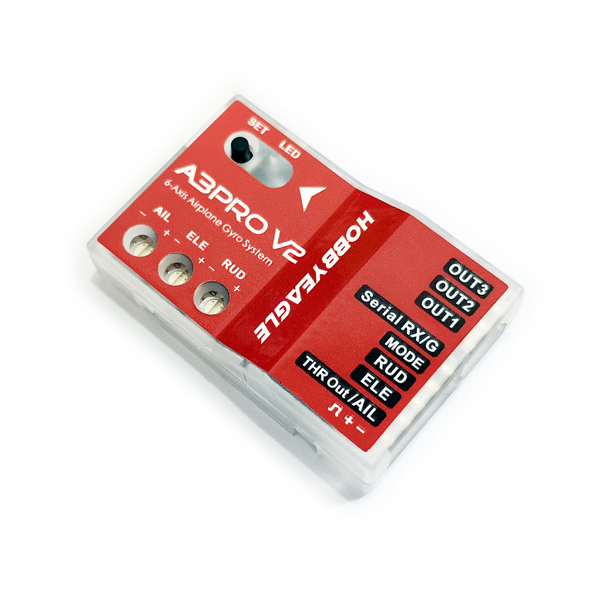
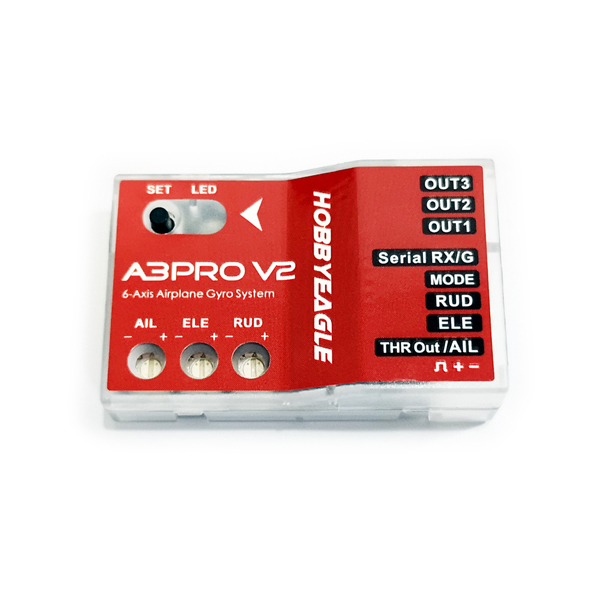
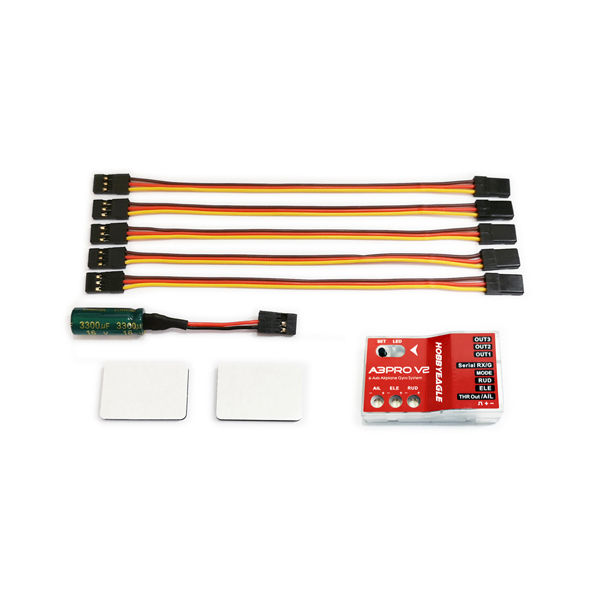
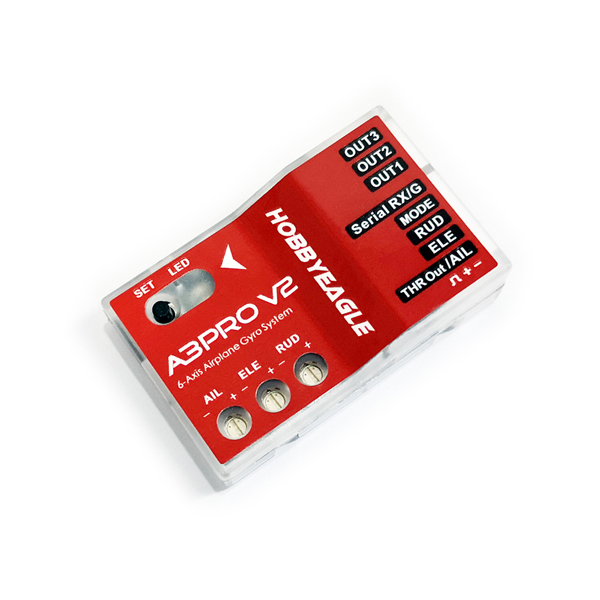
HobbyEagle A3 Pro 6-axis Gyro Flight Controller/ Stabilizer | V2 |
|
||||||
|
||||||||
|
||||||||
| Tags: Eagle flight stabilization flight controller | ||||||||
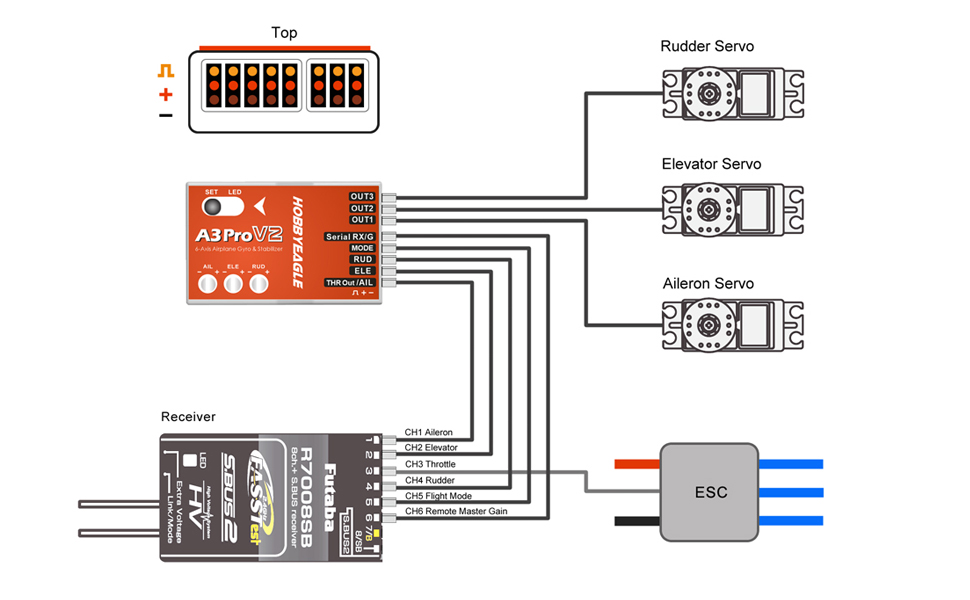
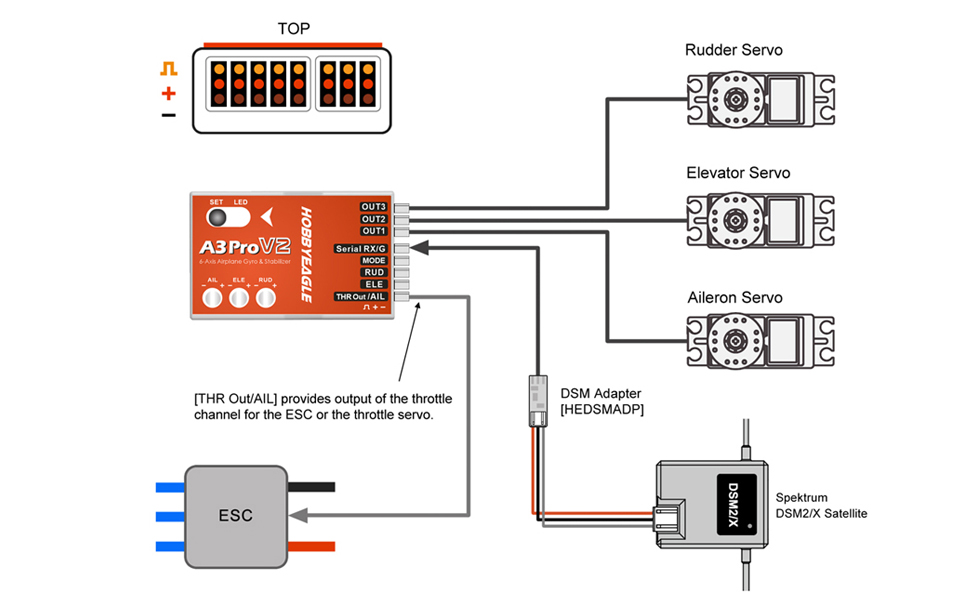
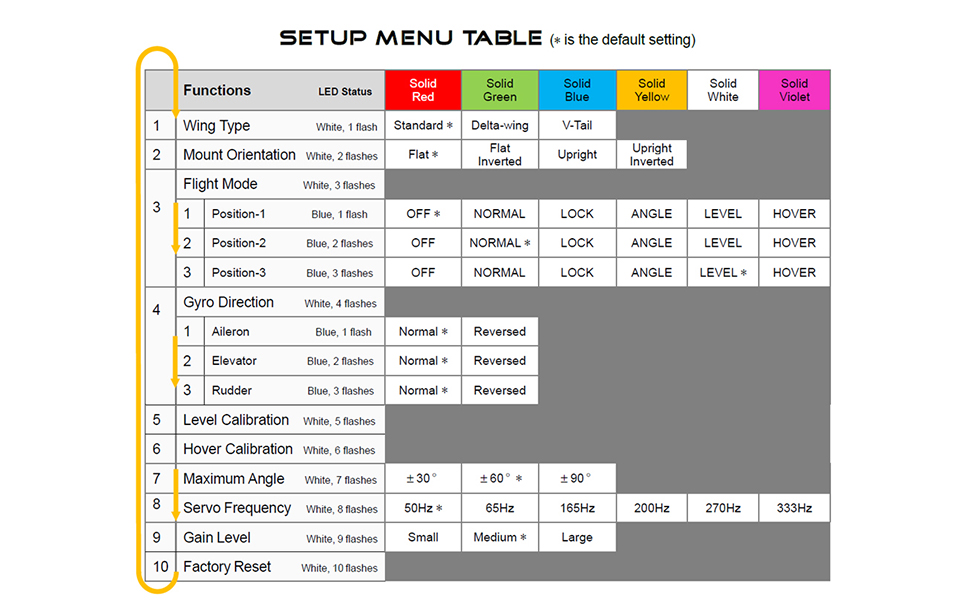
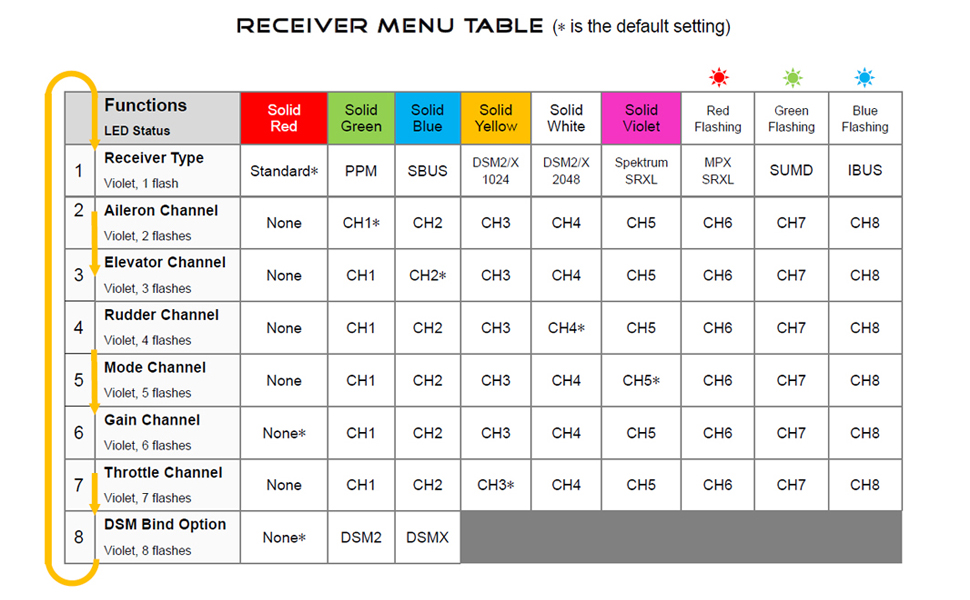
【Specifications】Main Controller: 32-bit MCUSensor: High-precision MEMS 6-axis sensorGyroscope Scale Range: ±2000 dpsAccelerometer Scale Range: ±4gPWM Output: 920uS to 2120uS with 1520uS center length, 50Hz to 333HzInput Voltage: 4.8V to 8.4VOperating Temperature: -10 ℃ to 50 ℃Size: 43x27x14mmWeight: 10g (excluding wires)

|
©2003-2026 HiModel All Rights Reserved. |
|
|