| SKU | STG661-A |
|---|---|
| Brand | SpringRC |
| Manual | Manual 1 |
| Added | 2012/08/11 |
| Updated | 2012/08/22 |
Features:
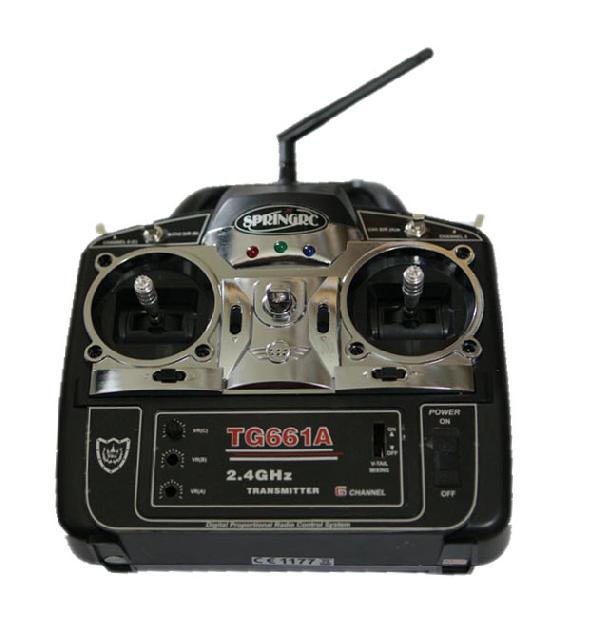
THIS IS THE NEW VERSION TG661A (A UPGRADING OF TG661).◇6 Channel 2.4G transmitter with 6 Channel 2.4G receiver
◇Servo reverse function.
◇Channel 6 flap rudder changeable funtion
◇Channel 1、Channel 2 (aileron/Elevator) Mixed control function
◇Channel 6 flap rudder changeable funtion.
◇Electronic trim.
◇Low power alarm.
◇Operating trequeney indicate function.
◇Flight simulator Function(Without Simulator wire).
Specifications:
Transmitter specification:Type: TG661A
Stick mode: mode 2 (throttle on left hand)
Frequency:2.4GHz-2.483GHz
Modulation:FSK
Transmission system: FHSS (frequency hopping)
Channel count: 21
Trim type:electronic stepping
Power supply: C 9.6V to 12V (AA x 8)
Receiver type:RG661A
Channel number: 6 channels
Voltage:4.8--6V
Weight:5.2g
Size:34*21*14mm
*HINT: There are no knobs for VR(B)and VR(A) trims, they are designed to be adjusted with a screw driver, also the V-TAIL MIXING switch is also "hide" inside, and can only be moved by a tweezers or a thin rod, this design will avoid those settings are changed accidentally, also those settings normally not supposed to be adjusted frequently.
Includes/Requires:
Includes:1 x transmitter 2.4g
1 x mini 6-ch receiver
Comments:
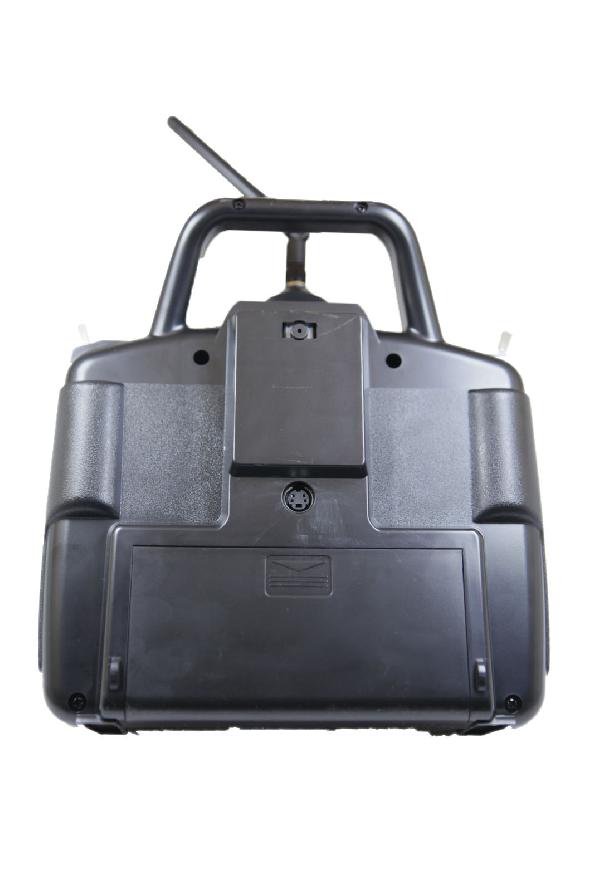
HiModel Note:Binding method:
1-press and hold on the button on the back of the radio and switch on the transmitter.
2-Switch on the radio (Switch on the transmitter first, NOT the receiver, and the button on the back should be held down while switching on)
3-the blue LED will blink slowly
4-press & hold down the button on the receiver frequency
5-connected the receiver with the button held down for no less than 2 seconds (The button on receiver must be hold down, and can only be released 2 seconds later since the receiver battery is connected)
6-LED of the receiver is not lit (There is no visible changes in this process)
7-Disconnect the power of both receiver & transmitter.
8-Re-power on the transmitter (Do NOT press the button on the back, and the transmitter MUST be powered on first)
9-Re-power on the receiver, the LED of the transmitter will flash several times, and becomes steady light, the receiver LED will also flash several times, and then becomes steady light, now they are successfully bind.