| SKU | DSM29C |
|---|---|
| Manual | Manual 1 |
| Added | 2011/04/28 |
| Updated | 2013/04/10 |
Features:
JR/SPEKTRUM CompatibleKey Features
◆ 9 channels
◆ Patent pending Model Match prevents flying a model using the wrong model memory (feature does not work with module systems)
◆ Servo Sync (feature does not work with module systems)
◆ Preset fail safe system
◆ Quick Connect
◆ Horizontal-Pin configuration
◆ Red LED indicates number of hold
◆ Compatibility (Spectrum and JR DSM2): DX6I,DX7,DX9,DSX7,DSX9
◆ Working Voltage: 4 - 10v
◆ Wireless simulator interface (W.D.S.C) supports REFLEXTR, G3, G4 and G5. (Simulator software not included)
Specifications:
◆ Type: 9-Channel Full-Range DSM2 Receiver◆ Modulation: DSM2
◆ Band: 2.4GHz
◆ Dimensions (W x Lx H): 30 x 50 x 13mm
◆ Weight: 19g
◆ Voltage Range: 4-10v
◆ Brown-Out Voltage: 4.0v (Always supply power above this voltage)
◆ Antenna Length Main RX: 30mm (2)
Wireless simulator interface(W.D.S.C)
1. Main receiver and satellite must connect.
2. Receiver must bind with transmitter first (AUX4 channel do not plug binding harness)
3. AUX3 is the (W.D.S.C) channel, connect with simulator line
4. BIND channel and AUX4 channel plug the binding harness
5. Apply power to the receiver with USD line or battery
6. Turn transmitter on, now both LEDS keep light and simulator works
Binding Procedure
1. Put the binding harness into connector location marked BIND. Next apply power to the receiver. Both receiver and Satellite LED's should illuminate.
2. To set fail-safe throttle and control surface positions, (minimum throttle and all control surfaces set to neutral is suggested). Press and hold the bind button of transmitter (LED will illuminate), Turn on the transmitter.
3. Receiver LED will change from rapid flashing to slow flashing and a few seconds later when bind is accomplished the LED of both satellite and main receiver will illuminate solid. All fail-safes should be programed correctly now.
4. Remove binding harness from the BIND channel. Restart the receiver by cycling it power off and turn on. All channels should function properly now. You may test fail-safe by holding sticks in corner, cycle transmitter on and off. Surfaces and throttle should return to your preset fail-safe positions.
General Notes:
Only one bind procedure is required on a new receiver. Repetitive binding provides no extra security. Always remember to remove the binding harness after successful bind is completed.
Includes/Requires:
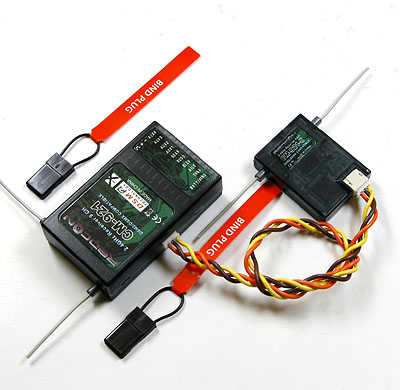
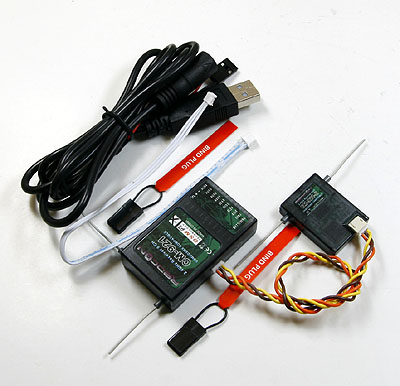
Includes:1 x DSM2 9-ch receiver
1 x satellite
1 x USB power line
1 x simulator connect line
2 x bind plugs
*Plain packing, no labels, no instruction manual.
Comments:
Hint:Please make sure your transmitter is DSM2 instead of DSM (the first generation), as DSM2 receiver does not compatible with DSM TX.